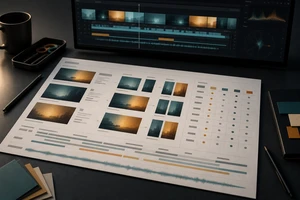
The most dangerous phrase in a sample review meeting is not "this doesn't look good," but when everyone says "it's fine" without clearly stating what can be shot, what can be proven, and who it will be delivered to. Once the formal production of a product video starts, direction debates turn into budget overruns and reshoots. The purpose of a sample review is to compress aesthetic preferences into an actionable judgment card.
This article provides brand marketing, product marketing, and production procurement teams with a five-column method: Objective, Evidence, Shot, Version, Approval Criteria. It is not an aesthetic scorecard, but a framework that turns "is this creative idea worth shooting" into a question that can be jointly verified by product managers, directors, producers, and final approvers.
Shift the sample from "does it look good" to "what task must it accomplish"

The brief must first clarify the objective, audience, message to convey, and delivery format — only then does the sample have context. Adobe's approval documentation separates reviewers, approvers, and asset status; Product Marketing Alliance's video brief template also places objective, audience, and purpose in leading fields. In other words, a sample is not an isolated image — it must answer which perception the product video intends to change.
Before the meeting, write one decision sentence: Who should believe what verifiable thing about the product, in what scenario, after watching this video? If the only answer is "we hope it looks premium," the project is not yet ready for sample review.
The five-column approval card: Objective, Evidence, Shot, Version, Criteria
List each key selling point in a row and fill in the five columns as follows:
- Objective: What the audience needs to understand or be willing to verify after watching.
- Evidence: Product documentation, physical condition, test conditions, or on-set action; if no evidence is available, mark it "pending."
- Shot: Subject, action, shot scale, duration, and details that must appear.
- Version: Which version needs it — main video, product page, sales presentation, or landscape/portrait format.
- Approval criteria: Factual accuracy, action feasibility, text readability, audio deliverability, or directional discussion only.
The most common pitfall at the sample stage is using a single mood board to simultaneously serve as product proof, brand tone, and platform cropping. The five-column card forces trade-offs: if a shot only serves atmosphere, do not present it as product evidence.
Review the script and storyboard first — approving a still frame does not mean it can be filmed
Public video approval templates typically split the brief, script, storyboard, silent rough cut, and sound version into adjacent nodes. The production logic behind this is straightforward: confirm the information path first, then confirm visual execution. If the sample skips the shot task, it is only during formal production that you discover the product action has no starting point, key details have no close-up, or the subject gets cropped when switching to portrait mode.
Before the meeting, ask the director or producer to add three items for each key shot: the start and end of the action, the samples or props needed on set, and an alternative shot scale in case of failure. Only when the shot holds up visually has the project moved from reference image to production.
Categorize feedback into three types — do not let preferences masquerade as rework
Use a three-color trigger system during sample review:
- Red: Factual or product state error. Stop and correct the documentation, shot, or qualifier first; cannot be masked by post-production.
- Yellow: Shot execution is not viable. Determine whether to reshoot, change the shot scale, or use an alternative action to achieve the same objective.
- Blue: Directional preference adjustment. Document the trade-offs and costs; proceed to the next version only after the final approver confirms.
The approval chain must also be clearly documented: who provides product input, who judges creative direction, who is responsible for the budget, and who holds final decision authority. Adobe Workfront's review and approval documentation emphasizes roles, dependencies, and records; PlayPause's reminder on video approval is also straightforward: approval boundaries should be written into the brief early in the project. Multiple participants does not mean everyone holds equal veto power.
Review feedback must be anchored to timestamps and versions — do not just say "it doesn't feel right"
Once the project moves to motion samples, feedback must include at least the version number, timestamp, issue type, corrective action, responsible person, and closure criteria. Frame.io's video workflow places timecode and version context within the review chain; common practice in editing workflows is to separate rough cut, fine cut, and final review to avoid reopening the entire creative direction at the final approval stage.
Write feedback like: "V1, 00:08, product interface not visible; add a side close-up; if sample condition does not support it, switch to a structural illustration and mark as pending confirmation." This is closer to an actionable task than "this isn't clear enough" and is easier to verify in the next version.
Finally, use a lock card to bridge production and delivery
When the sample is approved, do not just save a JPG. Lock down five things: the confirmed objective, the product facts that must not change, the shots that must be captured, the content permitted for post-production adjustment, and the final approver for the next milestone. Then carry the shot numbers into the shot list, rough cut feedback, and delivery acceptance.
ONCE's take: the biggest risk in sample review is not a client saying "it doesn't look good," but everyone saying "it's fine" about different visuals, versions, and objectives. If you are conducting a product video sample evaluation, start by reviewing the product video production solution, then submit the sample status, target shots, and version requirements to schedule a sample evaluation.