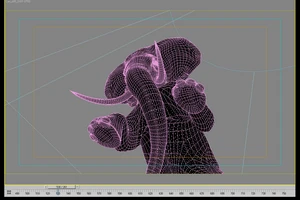
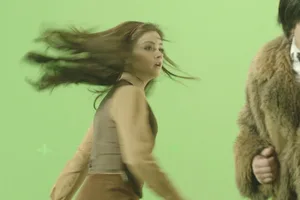
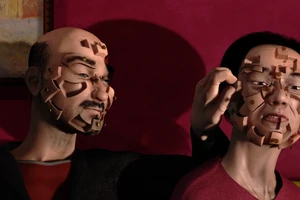
First, determine what role the product will play on screen.
When a TVC commercial is greenlit, whether the product is the protagonist or a supporting role determines the choice between a practical model and a 3D product. If the product needs to show material details, structural precision, or real light and reflection, a practical model can provide physical texture, but model production takes a long time and revisions are costly. If the product needs to deform, explode, pass through, levitate, or enter a microscopic perspective, a 3D product can provide fully controllable dynamic performance, but realism depends on rendering and compositing quality.
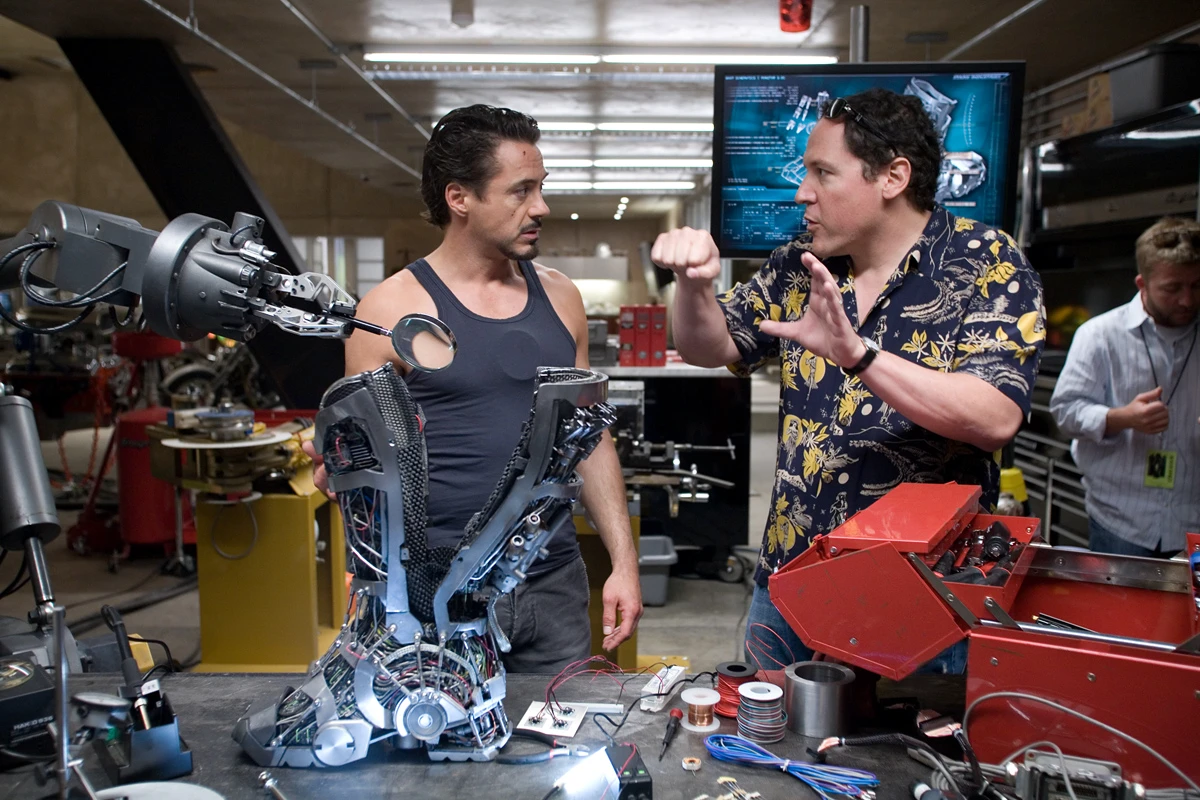
The brand side should clearly define the product's core actions in the script early on, such as whether it rotates, disassembles, collides, melts, or reassembles. Only after the production team receives the action list can they determine which shots suit a practical model and which shots must use a 3D product. Don't lock in the technology before writing the script; the technical choice should serve the shot's task.
The criterion is to list the physical requirements for each product close-up, including surface reflectivity, sense of weight, motion trajectory, environmental interaction, and camera movement. If the product needs to interact with a real actor's hands, a practical model is usually more natural, but multiple backup models need to be prepared. If the product needs to pass through buildings or scale up to a city scale, a 3D product is the only viable solution.
The risk is that when the two techniques are mixed, inconsistent light direction and shadow density will immediately be noticed by the audience. Therefore, the technical assignment of each shot must be determined at the project initiation stage, and lighting reference images must be unified.
Which TVC commercial shots are suitable for practical models
Practical models are suitable for shots where the product itself has a tangible texture, needs to be touched up close, or needs to blend with a real environment. Examples include cosmetic bottles, car interiors, food surfaces, mechanical parts, and electronic product casings. Models can be made from resin, metal, wood, or 3D printing, and surface finishing must achieve photographic-level precision.
The production team must confirm three things before model fabrication. First, whether the model is only for close-up or partial shots, which determines whether only visible surfaces need to be made. Second, whether the model requires moving parts, such as switches, rotating shafts, or detachable structures, which determines the internal mechanical design. Third, whether the model needs to withstand shooting intensity, such as repeated impacts, liquid splashes, or high-temperature lighting, which determines material selection.
The brand must provide CAD files, engineering drawings, or high-precision scan data for the product prototype. Without original data, the production team needs to measure manually, which increases lead time and the risk of error. It is recommended to create a simple white model before model production for lighting tests, confirming whether reflective properties meet the shot requirements.
Shooting risks for physical models include surface fingerprints, dust, scratches, and revealing reflection spots. The set needs dedicated cleaning tools, dust covers, and backup surface treatment materials. Prepare at least two identical versions of each model, one for the official shoot and one for backup or reshoots.
An exception is when the product itself is still in the prototype stage and does not yet have a final appearance. At this point, physical models cannot be quickly modified, so 3D products should be prioritized. Additionally, if the product needs to show internal structure or perspective effects, physical models require cutting or transparent treatment, and costs will rise significantly.
Which TVC commercial shots are 3D products suitable for
3D products are suitable for shots requiring dynamic deformation, physics simulation, extreme angles, batch duplication, or post-production adjustments. Examples include a product condensing from liquid to solid, a product disassembling and reassembling in space, a product rapidly moving with the camera, or a product repeatedly appearing in multiple scenes in different colors.
Before a 3D project starts, the production team must confirm product modeling accuracy, material scan sources, and rendering resolution. Modeling accuracy depends on camera distance; if the product only appears in a medium shot, a high-poly model may waste resources. Material scanning requires real product samples or high-dynamic-range environment maps, not just guesswork from photos.
The brand must provide multi-angle photos of the product, material references, color standard values, and surface treatment process descriptions. Examples include brushed metal, matte plastic, or glossy paint finish; this information determines material node setup. If the product has glowing or semi-transparent parts, light transmittance and color temperature data must be provided.
The risk with 3D products is uncontrollable render time, especially in scenes with complex reflections and global illumination. The production team must run low-res tests early, estimate per-frame render time, and reserve enough render farm hours. Another risk is animation motion that does not match real-world physics, such as product rotational inertia, gravity drops, or liquid viscosity, which requires physics simulation or hand-animation adjustments.
An exception is when the product needs complex interaction with real actors, such as being held, tossed, or worn. In this case, the 3D product must precisely match the actor's movements and lighting, which is more difficult than using a practical model. For such shots, we recommend using practical models or a hybrid approach, using 3D only for parts that must be replaced.
How to split shots and handoff nodes in a hybrid approach
Most TVC commercials combine practical models and 3D products; the key is splitting shots and defining handoff points. A product shot may use a practical model to provide base lighting, while the 3D product replaces parts or adds dynamic effects. For example, the practical model captures a static product close-up, and the 3D product handles the subsequent rotation and deformation animation.
The production team should create a shot breakdown table listing each shot's technical ownership, footage clip numbers, 3D asset names, and compositing layer order. The breakdown table must be confirmed before shooting to avoid discovering missing critical assets in post. Each handoff point needs a clear output format—for example, practical footage is delivered as uncompressed image sequences, and 3D renders are delivered as OpenEXR files with alpha channels.
Brand stakeholders should focus on product consistency in a hybrid workflow. Practical models and 3D products must use the same scale, color standards, and material references. We recommend creating a product reference sheet with front, side, top, and 45-degree views for both teams to share.
The risk is that the lighting on the practical model and the rendered lighting on the 3D product are hard to match perfectly. The solution is to record light positions, intensity, color temperature, and shadow direction on set and feed that data into the 3D rendering environment. If practical lights are used on set, the 3D team needs to build a virtual lighting array to match.
Another risk is timeline sync. The frame rate, shutter angle, and motion blur of the practical footage must match the 3D render. The production team should set a unified project frame rate and enable motion blur in the 3D render. If a practical shot has handheld camera movement, the camera motion data needs to be tracked and applied to the 3D scene.
The exception is when a product needs to continuously transform throughout the shot, such as from liquid to solid to gas. Live-action models can rarely be used then; the product should be fully 3D. But if there is real contact before and after the change—for example, the product landing on a table—you can shoot the tabletop and the product’s initial state in-camera, then let 3D take over the subsequent transformation.
What materials should the brand prepare during the project kickoff stage?
During the TVC project kickoff, the brand should prepare a product information package, including high-resolution product photos, dimension drawings, material descriptions, color standards, surface finishes, packaging formats, and usage scenarios. If the product comes in multiple colors or versions, specify which ones need to appear on screen.
Campaign objective materials include target audience descriptions, core selling point prioritization, competitor reference videos, and brand tone keywords. These materials help the production team determine the priority of each product shot’s emphasis—for example, if the selling point is durability, the shot should highlight structural strength; if the selling point is portability, the shot should emphasize lightness and size.
Reference materials include competitor TVCs, ads for similar products, film VFX clips, and visual style images. For each reference, mark the specific timecode and explain which shot, lighting, or camera move you like. Don’t just send a video link—the production team can’t accurately understand your intent.
Shooting condition materials include location photos, available lighting equipment, shooting time windows, talent schedules, and weather restrictions. If practical models are planned, the model production budget cap and production cycle must also be provided. If 3D products are planned, the rendering machine-time budget and final delivery resolution must be provided.
Delivery platform materials include distribution channels, aspect ratios, duration versions, and subtitle requirements. For example, TV commercials may require 30-second and 15-second versions, social media requires vertical versions, and outdoor screens require higher-brightness versions. These materials affect post-production editing and render settings.
Copyright materials include product design patents, trademark usage authorization, music copyrights, talent portrait rights, and font licenses. The production team needs to confirm whether these rights cover filming and post-production to avoid legal disputes after delivery.
Key Points for Coordinating Practical Models and 3D Products During Shooting
During the shooting execution phase, coordinating practical models and 3D products requires advance planning of the on-set workflow. If 3D products are planned to replace models, sufficient reference materials must be shot on set, including reflection spheres, gray spheres, color charts, and lighting reference boards around the product. These materials help the 3D team match environmental lighting.
When filming the practical model, camera movement should be kept as smooth as possible, avoiding sudden stops or rapid zooms, because post-production 3D compositing requires stable tracking points. We recommend placing tracking markers in the scene, such as black tape crosses or reflective balls, to facilitate later camera tracking. Markers should be kept away from the main product to avoid revealing them in the final shot.
If the product needs to interact with 3D elements, such as cracks appearing on the surface or liquid flowing, the practical model should remain still or move slowly to allow the 3D team to match it frame by frame. On set, record the model's position, angle, and height, and shoot top and side views for reference.
Lighting setup should accommodate both practical filming and 3D compositing. Record the contrast ratio, hard light, and soft light ratios for the practical model, as the 3D team needs these parameters to create matching virtual lights. If natural light is used on set, record the sun angle and cloud changes, as the 3D team needs to simulate natural color temperature shifts.
During shooting, also pay attention to reflective spots on the model's surface. If the model surface has strong highlights, they are difficult to remove during 3D compositing. We recommend using matte spray or a polarizing filter to reduce reflections, but be careful not to alter the product's true appearance. If the product itself has a glossy finish, the reflections should be preserved, and the 3D team will match them using reflection maps.
The risk is that on-set shooting time is limited, and the 3D team cannot preview the composite in real time. We recommend using a real-time compositing previsualization system during filming to roughly render and overlay the 3D product onto the live-action footage, confirming whether position, size, and motion match. If the previsualization reveals discrepancies, shooting parameters can be adjusted immediately.
The exception is when a product needs to be shot underwater, in high-temperature, or in a vacuum environment. A practical model may not withstand these conditions, while a 3D product can simulate physical effects. But if the product needs to interact with real water splashes or flames, a practical model combined with real special-effects elements may look more natural; a 3D product would require complex fluid simulation.
How Post-Production Verifies the Match Between 3D Products and Practical Models
During post-production, verifying the match between 3D products and practical models is a core step. The production team must create a verification checklist and inspect each item: product silhouette, material reflections, shadow direction, motion blur, and depth of field. Each item needs to be compared against the live-action reference frame and the 3D render frame.
Product silhouette verification uses edge-detection tools to overlay the 3D rendered product's outline onto the practical model's outline; deviation should not exceed one pixel. If the deviation is obvious, the 3D model's proportions or camera focal length need adjustment. Material reflection verification uses reflection map comparison to check whether environmental objects reflected on the product surface match the live-action footage.
Shadow direction verification requires checking the length and angle of the product's cast shadow and comparing it with the practical model's shadow. If the shadow direction is inconsistent, the 3D light position is wrong. Motion blur verification requires checking the length and direction of the product's motion trail and matching it to the motion blur of the live-action footage.
Depth-of-field verification needs to check the product focus position and the degree of background blur. If the live-action shoot uses a large aperture for shallow depth of field, the 3D render needs to enable depth-of-field effects and match the aperture value. The production team must use the same set of lens parameters and sensor size settings.
Color verification uses color charts and gray cards to ensure that the product colors in the 3D render match the live-action model under the same lighting. If the product color is off, adjust the material color or light color temperature. It is recommended to perform color matching before color grading in post to avoid masking issues after grading.
The risk lies in the different noise levels between 3D renders and live-action footage. Live-action footage will have noise at high ISOs, while 3D renders are usually clean. During compositing, noise needs to be added to the 3D render to unify image texture. The production team should use noise-matching tools or directly use the noise layer from the live-action footage.
During delivery review, the brand side must check whether seams are visible in each hybrid shot. It is recommended to play back full screen on a standard monitor and zoom to 200% to inspect product edges. If seams are found, the production team needs to recompose or adjust 3D render parameters. The acceptance standard is that seams are invisible and product motion is smooth without dropped frames.
Acceptance Checklist and Deliverable Documentation Method
TVC commercial project acceptance must be recorded by stage, not just based on the final cut. The brand side should establish an acceptance checklist, including script confirmation, storyboard confirmation, model production confirmation, footage confirmation, 3D rendering confirmation, editing confirmation, color grading confirmation, audio confirmation, subtitle confirmation, and master confirmation. Each stage must have a responsible person's signature or email confirmation.
Script confirmation should check whether the storyline is complete, product selling points are clear, and target audience matches. Storyboard confirmation should check whether each shot's composition, movement, lighting, and product performance meet expectations. Model production confirmation should check whether model proportions, surface details, and materials are consistent with the product.
Footage confirmation should check whether image clarity, exposure, focus, and color meet standards. 3D rendering confirmation should check whether product dynamics, materials, lighting, and compositing effects match. Editing confirmation should check whether pacing, transitions, narrative logic, and product exposure duration meet requirements.
Color grading confirmation should check whether overall tone, contrast, saturation, and product color are accurate. Audio confirmation should check whether voiceover, music, sound effects, and mixing are clear and balanced. Subtitle confirmation should check whether text content, font, size, position, and timing are correct.
Master confirmation should check whether delivery format, resolution, frame rate, codec, and color space meet platform requirements. Source file delivery should include project files, footage files, 3D assets, render sequences, compositing projects, and color grading versions. The brand side should confirm that source files are editable and include all layers and adjustment parameters.
Deliverables should be tracked with version numbers, such as V1, V2, and V3, with each revision's content and date recorded. The brand should retain all versions of the final cut to trace the revision history. If third-party assets are used, confirm that authorization documents are included in the deliverables.
The acceptance risk is that the brand only reviews the final cut and overlooks intermediate stages, leading to higher post-production revision costs. We recommend scheduling mid-stage reviews at key production and post-production milestones, such as after model completion, after 3D render tests, and after the first edit is complete. Mid-stage reviews can identify issues early and avoid rework.
The exception is when the project timeline is tight and a full acceptance review is not possible. In this case, the brand should prioritize confirming whether the product presentation and core selling points are clear; other details can be added later. However, source files and copyright authorizations must be fully delivered, or future edits and republication will not be possible.
When Live-Action Models and 3D Products Are Not Applicable
Live-action models are not suitable when a product's appearance or color scheme needs frequent changes and the revision cycle is shorter than the model production cycle. For example, if the product is still in design iteration with a new version every week, a live-action model cannot keep up. In this case, a 3D product should be used, as materials and colors can be changed simply by adjusting parameters.
Practical models are not suitable for products with extreme dimensions, such as tiny chips or massive construction machinery. Miniature models are difficult to craft with fine details, and oversized models are too costly and hard to transport. 3D products can be modeled at any scale and are not limited by physical size.
3D products are not suitable when the product requires real physical contact and the contact surfaces must match precisely. For example, when interacting with real liquids, powders, or fabrics, 3D simulation may not be realistic enough. In such cases, practical models with real materials work better, but multiple attempts are needed.
3D products are not suitable when the project budget is extremely low and there is insufficient render time. 3D rendering requires substantial computing resources; if the budget cannot cover rendering costs, the final output quality will decline. In such cases, practical models may be a more economical choice, but model-making capability is required.
Hybrid solutions are not suitable when the project timeline is extremely short and the team lacks experience. Hybrid solutions require close collaboration between live-action and 3D teams; poor communication or insufficient technical skill can easily cause matching issues. In such cases, it is recommended to choose a single technique to reduce execution risk.
Another unsuitable scenario is when the product itself has special optical properties, such as chameleon paint, holographic surfaces, or fluorescent materials. These characteristics are difficult to reproduce accurately in practical models or 3D products. It is recommended to conduct technical tests first to determine which technique can deliver the best result before deciding on the main approach.
When a brand initiates a project and finds the product needs to reveal internal structures or perspective effects, a live-action model must be cut or made transparent, whereas a 3D product can easily achieve semi-transparent materials. However, 3D products cannot show real physical structures, such as the mechanical movement of screws, springs, or gears; a live-action model is more realistic.
Next Steps
Before launching a TVC commercial project, complete product technical testing first. The production team uses product prototypes or high-precision scan data to create a small-scale live-action model and a low-precision 3D product, shoots test shots, and compares the results. The testing period is usually three to five days, which can significantly reduce the risks of formal production.
The brand and production team jointly fill out a technical selection table, listing the physical requirements, technical ownership, budget range, and risk level for each product shot. Once confirmed, the table serves as the basis for project execution, preventing last-minute changes to the technical solution later on. The selection table should include acceptance criteria for each shot, such as invisible seams, smooth motion, and accurate color.
If the project budget is limited, prioritize production quality for the core selling-point shots and simplify the rest. For example, use a real product model for rotating product displays and a 3D product for transformation effects, but limit transformation shots to two or fewer. This delivers the best results within a limited budget.
Finally, we recommend that the brand keep a complete production archive after the project, including the technical selection sheet, model production records, 3D rendering parameters, compositing project files, and acceptance records. These archives can inform future TVC commercial projects and reduce repeated testing and communication costs.
If you are preparing a TVC commercial project, start by organizing the brief, reference images, product or company materials, delivery platforms, and copyright scope, then visitTVC Commercial Services page, turning communication from abstract preferences into executable production boundaries.