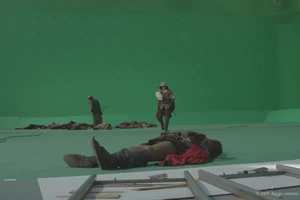
Why Limited Locations Actually Need Spatial Variation
TVC commercials often face limited spaces like a single studio, office, home, or product display area, where the size and structure of the set are restricted. However, the audience's perception of on-screen space depends not on actual area, but on the layers, movement, lighting, and sound presented through the lens. Spatial variation focuses on visual and psychological expansion. Brands must clarify at the outset that spatial variation serves product selling points or brand mood, not showmanship. If the product is furniture, spatial variation should convey size and material; if it is food, it should stimulate appetite and scene association; if it is a tech product, it should communicate efficiency or a sense of the future.

To determine whether a limited scene is worth investing in spatial variation, ask three questions. First, does the product selling point rely on environmental storytelling—for example, outdoor gear needs to show terrain, but a studio cannot accommodate a real mountain. Second, will the target audience experience aesthetic fatigue with a single scene—for example, short videos for social media need visual change within the first three seconds. Third, does the budget support post-production expansion—for example, CGI-extended walls or composited backgrounds. If all three answers are no, then keeping a single scene simple is more effective; forcing spatial variation will seem contrived and waste budget.
Spatial requirements to break down during project initiation
When initiating a project, the brand side should not just ask for a vague sense of space; it should break the request into executable requirements. First, clarify the purpose of the spatial change—whether it is to show the product from multiple angles, create a narrative atmosphere, or produce a memorable visual moment. Second, list the spatial elements that must appear, such as windows, doors, stairs, mirrors, and columns; these elements can later serve as anchor points for extension. Third, determine the intensity of the spatial change—whether it is a slight push-in or pull-back, multi-camera jump cuts, or a full virtual background replacement. Intensity directly affects shooting complexity, post-production workload, and budget.
After receiving the requirements, the production team should deliver a spatial-change feasibility checklist. The checklist includes measured scene dimensions, movable walls or props, lighting rig points, power capacity, window orientation, and natural-light windows. This information determines which spatial changes can be shot practically and which require post-production compositing. The brand side should participate in confirming the checklist, because certain constraints affect creative expression. For example, if the scene height is insufficient for an overhead dive shot, the creative approach must change to a horizontal move or a rotation. If the brand side refuses the adjustment, the budget must be increased for virtual production or CGI; you cannot assume practical shooting can solve every problem.
How the creative script leaves room for spatial changes
The most common mistake at the script stage is writing spatial changes as adjectives, such as "the frame is full of dynamism" or "space extends infinitely"; these cannot guide the shoot. The correct approach is to write specific camera movements and spatial relationships. For example, the camera starts on a product close-up, pulls back to reveal the table the product sits on, continues pulling back to reveal the entire room, and finally moves through the window to reveal the city skyline. This description clarifies shot-scale changes, movement direction, and spatial hierarchy. The script should also mark which elements are practical and which are added in post-production; for example, the city outside the window can be a practical backing or a CGI composite.
Another interface is sound design. Spatial changes visually require sound to match, such as when the camera pulls back, ambient sound shifts from enclosed reverb to open reflections, or wind and traffic sounds are added. The script stage must reserve sound tracks; otherwise, post-production cannot match them accurately. When the brand reviews the script, it should check whether each spatial change has a corresponding sound cue, and add one if not. At the same time, the script should avoid over-relying on a single shot—for example, a long take spanning all spatial changes may have strong visual impact, but low shooting tolerance and difficult post-production adjustments. It is recommended to split it into multiple short shots, with each shot completing one spatial layer, so that post-production can replace or adjust them individually.
Storyboards and previsualization turn spatial changes into executable plans.
The storyboard is the construction drawing for spatial changes. Each storyboard panel must note the shot number, shot size, movement, duration, frame content, sound reference, and post-production requirements. For keyframes of spatial changes, the before-and-after relationship must be drawn; for example, when the camera moves from indoors to outdoors, keyframes should include window frame position, the proportion of outdoor elements, and perspective. If 3D previsualization is used, spatial logic can be verified more intuitively, but previs is not live-action shooting; lighting and materials in previs are for reference only. When the brand reviews the storyboard, it should focus on checking whether the logic of spatial changes is coherent—for example, if the camera moves from point A to point B, whether there are occlusions or jumps in between, and these must be clearly shown in the storyboard.
The previsualization stage also requires technical verification. For spatial changes combining live-action and post-production compositing, the placement of tracking points must be tested, such as placing markers on walls and floors to facilitate later camera tracking. For virtual production, the refresh rate and color reproduction of LED backdrops must be tested to avoid moiré and color casts. These test results must be recorded as parameter references for shooting. If a test fails, return to the storyboard for adjustments, such as reducing camera movement or switching to green-screen compositing. The brand should understand that previs is not the final result, but it can reveal 80% of execution risks, so it cannot be skipped.
Spatial control and asset acquisition during production execution.
When shooting limited scenes, the core of spatial control is layering. The first layer is the foreground—such as products, props, or people—to establish the visual focus. The second layer is the midground—such as furniture, walls, or windows—to establish spatial scale. The third layer is the background—such as distant scenery or lighting effects—to extend spatial depth. During shooting, the three layers should each control focus, lighting, and motion speed separately. For example, fast movement in the foreground and slow movement in the background creates parallax and enhances the sense of space. The set should have enough props and movable partitions to temporarily change the spatial structure, but every change must be recorded for later matching.
Acquisition should exceed the needs of the final cut. In addition to the main shots, shoot empty plates, detail close-ups, background plates from different angles, solid-color reference charts, and lighting reference charts. These materials are used for post-production compositing and color grading. For key areas of spatial change, such as windows, door frames, and ceilings, shoot clean, unobstructed versions separately to facilitate later compositing or replacement. Ambient sound should also be recorded during shooting, including room reverb, equipment noise, and external environmental sound; these sounds are crucial for shaping spatial perception in post-production. The brand representative on set should confirm the shot list and not rely solely on the director’s verbal description; they must review the actual playback of captured footage, especially whether the motion path of spatial-change shots is smooth.
How Post-Production Editing and Color Grading Strengthen Spatial Changes
During editing, the rhythm of spatial changes should match the brand’s tone. Fast-paced editing suits younger products, while slow-paced editing suits high-end brands. When editing, pay attention to the causal logic of spatial changes; for example, if a shot pushes from indoors to outside the window, the next cut back indoors needs a clear reason, such as a character turning or an object moving. Edit points can be placed where motion stops or starts to reduce jarring jumps. For long shots with spatial changes, do not cut arbitrarily; keep the movement intact unless another shot needs to be inserted in post. When the brand reviews the rough cut, it should watch for whether spatial changes confuse the audience, such as loss of direction or scale distortion; if these occur, adjust the shot order or add transitions.
Color grading is an important support for spatial changes. Different spatial layers can be distinguished by color—for example, warm tones in the foreground and cool tones in the background, or yellowish tones indoors and bluish tones outdoors. During color grading, pay attention to the naturalness of color transitions to avoid obvious color banding. For backgrounds composited in post, color grading must match the direction and intensity of the live-action lighting, or the result will look fake. The colorist should use reference frames, such as a gray card or skin tone from the live footage, to ensure the color temperature of the composited background is consistent. In addition, vignetting and grain can add spatial depth, but overuse will reduce image quality. When the brand approves the color grade, it should check the colors on different displays, including phones, computers, and TVs, to ensure the spatial changes are presented on multiple devices.
Sound design and subtitles as aids to spatial change
Sound design is half of spatial change. Sound can imply spaces that are not shown; for example, when distant traffic is heard in a voice-over, the audience will imagine a street outside the window. Ambient sound recorded during filming should be layered, with foreground, midground, and background sounds adjusted separately for volume, reverb, and delay. For example, when the shot moves from indoors to outdoors, the indoor sound should gradually weaken, the outdoor sound should gradually strengthen, and the reverb should shift from short to long. The transition points of the sound should be judged in unison with the picture cut points, with an error of no more than one frame. The brand side should provide sound references, such as competitor ads or film clips, to help the sound designer understand the desired sense of space.
Subtitles and graphic elements can also enhance spatial changes, but care should be taken not to obscure key visuals. The position where subtitles appear can suggest spatial direction; for example, a product name slides in from the left side of the frame while the camera moves to the right, creating directional consistency. Subtitle font size and color should have sufficient contrast against the background to avoid disappearing in complex backgrounds. The brand side should confirm subtitle copyrights and font licensing, especially for commercial fonts, to avoid legal risks. In addition, subtitle motion should be restrained and not compete with image movement for attention, or it will weaken the immersion of spatial changes.
Delivery Acceptance Checklist and Common Risks
Delivery acceptance should be recorded by stage. First, check whether the script and storyboard were executed according to the confirmed version and whether any unauthorized changes were made. Second, whether the filmed materials are complete, including master shots, cutaways, reference charts, and sound files, and whether the material formats and codecs meet post-production requirements. Third, whether the edit versions meet platform duration and aspect ratio requirements, such as whether both horizontal and vertical versions are output. Fourth, whether color grading is consistent and whether there is color cast or flicker. Fifth, whether the sound is clear, whether there are pops or background noise, and whether the mix conforms to platform loudness standards. Sixth, whether the subtitles are accurate, with no typos or timeline offsets. Seventh, whether the master and source files are delivered, including project files, asset packages, and font files, to facilitate future revisions.
Common risks include product proportion distortion caused by spatial changes, such as wide-angle lens distortion that makes the product look unrealistic. The solution is to use a standard focal length or correct in post. Another risk is that the composited background does not match the lighting of the live-action footage, causing incorrect shadow direction. The solution is to record the angle and intensity of lights during the shoot for later reference. Another risk is that the sense of acoustic space does not match the picture—for example, the image is indoors but the sound feels outdoors. The solution is to use convolution reverb or sample matching. During client review, check each item against the list, provide feedback promptly, and avoid waiting until final delivery to request changes, because post-production revision costs increase over time.
When not to use spatial changes
Spatial changes are not a mandatory option for every TVC commercial. If the product selling point is very specific—for example, the torque of a screwdriver—then a single close-up shot is more effective, and spatial changes would distract. If the brand tone is minimalist and restrained, such as a high-end perfume, excessive spatial changes will undermine the sense of elegance. If the budget is limited and cannot support post-production compositing or virtual production, forcing spatial changes will result in rough effects; it is better to refine the texture of a single scene. If the distribution platform is social media and viewers mostly watch on mobile devices, overly complex spatial changes can look chaotic on small screens, so a clean composition is more suitable.
When it is determined that spatial changes are not suitable, the production team should proactively explain this to the brand and offer alternatives. For example, use changes in light and shadow instead of spatial movement, or use sound design to imply space rather than visual expansion. The brand should respect professional advice and not blindly add spatial changes in pursuit of a "high-end" look. The ultimate goal is for the TVC commercial to convey the message effectively, not to showcase technology. If spatial changes do not improve communication efficiency, they should be abandoned.
Next Steps Recommendation
When preparing a TVC commercial project, the brand side should first identify the product selling points and target audience, and clarify whether spatial changes are necessary. If they are, the production team should provide storyboards and previsualizations to verify feasibility. Before shooting, both parties should confirm the asset list and acceptance criteria to avoid later disputes. During shooting, all technical parameters and reference information should be recorded. In post-production, reviews should be conducted in stages and adjustments made promptly. Upon delivery, all versions and source files should be checked. If the project timeline is tight or the budget is limited, a small-scale test can be done first—for example, shooting a 10-second test clip to verify the spatial-change effect before deciding whether to fully execute. This reduces risk and improves the success rate.
If you are preparing a TVC commercial project, you can first organize the Brief, reference images, product or company materials, delivery platforms, and copyright scope, then visitTVC Commercial Service Page, turning communication from abstract preferences into executable production boundaries.