Why You Can't Just Start Shooting in Virtual Production
Many teams mistakenly believe that having an LED wall and a real-time engine is enough to start filming immediately. In reality, In-Camera VFX relies on complex hardware synchronization and software rendering. Skipping pre-production validation often leads to screen tearing, latency, or color shifts on set. The correct approach is to conduct tests first to determine if the toolchain meets project requirements.
Core Principles of In-Camera VFX
This technology allows virtual backgrounds to shift in sync with the physical camera's perspective. It relies on three elements: LED display, real-time rendering, and camera tracking. nDisplay distributes scenes across the display cluster, while Live Link receives camera, lighting, and transform data. Camera calibration must match the physical lens's position, orientation, and distortion; otherwise, perspective alignment will fail.
Infrastructure Matters More Than Screens
An LED stage is more than just buying a few screens. It requires a master clock to synchronize all nodes, a protected high-throughput LAN for video streaming, dedicated rendering nodes for processing, and stable monitoring links. Neglecting this infrastructure while focusing solely on screen size can lead to system crashes or signal loss.
Moiré and Pixel Visibility Testing
Screen pixel pitch, camera sensors, shooting distance, and angles all affect the final image. Lens tests must be conducted before principal photography to check for moiré and visible pixels. Different focal lengths have varying sampling requirements for LED walls, and unverified combinations can produce unsightly banding artifacts in the final output.
- Test Screen Clarity Across Different Focal Lengths
- Check for Image Smearing During High-Speed Motion
- Verify Natural Ambient Light Reflections
Lighting Strategies for Inner and Outer Frustums
The inner frustum displays backgrounds matching the camera's perspective, providing accurate reflections and environmental data. The outer frustum supplies surrounding ambient light and reflections, illuminating actors and props even when outside the camera's view. This layered design ensures consistent lighting.
Flexibility of Hybrid Shooting
For shots that cannot be completed entirely in-camera, green screens can be switched within the camera frustum while preserving lighting in the outer frustum. This approach combines the realistic reflections of virtual production with the flexibility of post-production compositing, making it ideal for complex VFX shots.
Performance testing takes priority over visual fidelity.
Epic's best practices emphasize that art and on-set teams must conduct performance tests together. A scene running smoothly on a workstation may not run stably on an LED wall. Frame rate fluctuations cause stuttering, severely impacting live-action results. Minimum specifications must be validated on actual hardware.
Pre-Delivery Checklist
- Verify camera tracking data is correctly synchronized with the engine.
- Ensure all shots are free of moiré patterns and pixel grids.
- Test lighting continuity at extreme angles.
- Back up all asset versions to prevent on-set failures.
Limitations and Further Resources
This article is based on general technical facts and does not cover specific client cases or budget figures. In actual projects, hardware selection must be customized to venue conditions. Please refer to the following official documentation for detailed technical specifications.
Prototype Testing: Validation from Workstation to LED Stage
Conducting rigorous prototype testing before finalizing the toolchain is critical to ensuring smooth project progression. The core objective of this phase is to confirm on-set stability and shot direction early, validating the stability and compatibility of the entire technical pipeline in a real production environment. Many production teams mistakenly assume that scenes running smoothly on high-performance workstations can be directly ported to an LED stage rendering cluster. However, Epic’s best practices explicitly state that art and on-set teams must jointly conduct performance testing due to significant differences in hardware environments and load mechanisms. Workstation GPU drivers, cooling conditions, and exclusive resource allocation differ fundamentally from the multi-node parallel processing of nDisplay clusters on stage. During prototype testing, the team must build a simplified stage environment or at least simulate the actual network topology, connecting the scene via Live Link to the physical camera tracking system. This step aims to expose performance bottlenecks often masked in development environments. For example, high-resolution textures or complex particle effects may perform well on a single machine but cause significant frame rate drops or screen tearing in a distributed rendering architecture due to data synchronization delays or bandwidth limitations. Additionally, prototype testing must rigorously verify the accuracy of camera calibration data. Camera position, orientation, and lens distortion parameters received via Live Link must perfectly match the physical attributes of the real lens. Any minor deviation will be amplified in the final image, causing perspective misalignment between the virtual background and foreground actors and breaking visual realism. Through iterative adjustment and optimization, the team can determine which assets require optimization and which rendering settings need compromise, establishing a viable technical plan for principal photography. This proactive stress testing effectively prevents downtime caused by technical failures during shooting, ensuring every minute of production time is utilized efficiently.
Delivery and Playback: Comprehensive Workflow Management for Image Quality Assurance
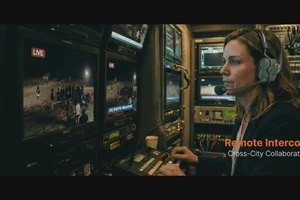
Once prototype testing is complete and the final toolchain is established, the delivery and playback phase serves as a vital safeguard for final image quality. This process involves more than simple file transfer; it is a technical playback workflow incorporating multiple verification steps. First, delivered content must undergo strict format conversion and quality compression testing to ensure consistent color space and dynamic range across all monitoring devices. Monitoring chains in LED stages often involve complex signal routing, including main monitors, director’s monitors, and remote collaboration terminals, each requiring precise color gamut mapping calibration. During playback, technicians must use professional oscilloscopes and waveform monitors to analyze output video signals frame by frame. Key checks include color banding, black level shifts, or highlight clipping. Particularly for scenes relying on inner and outer frustum layering, playback must verify natural transitions between these zones and physically accurate lighting intensity. Background reflections provided by the inner frustum must remain logically consistent with ambient light projected onto actors by the outer frustum; any mismatch creates visual dissonance. Furthermore, playback must specifically evaluate dynamic footage performance. Virtual background response speed and clarity are crucial during rapid camera movements or zooms. Technicians must review footage at various speeds to confirm there is no significant input latency or image jitter. If issues arise, they must be traced immediately to the source, whether caused by packet loss in nDisplay data distribution or protocol conflicts in Live Link. Only after multiple rounds of meticulous playback and correction, ensuring all technical metrics meet preset standards, should the final version be delivered to editorial and post-production teams. This rigorous process not only enhances the visual quality of the final product but also reserves sufficient time for potential revisions, reflecting the pursuit of detail and comprehensive technical risk management inherent in professional filmmaking.